Mastering 2-to-3 Lane Balancers in Factorio: Proven Blueprints and Builds
Long 5x7 and wide 7x5 layouts fit different spaces, while a compact express print is blue-belt-ready. One-input and blocked-output tests expose edge cases.
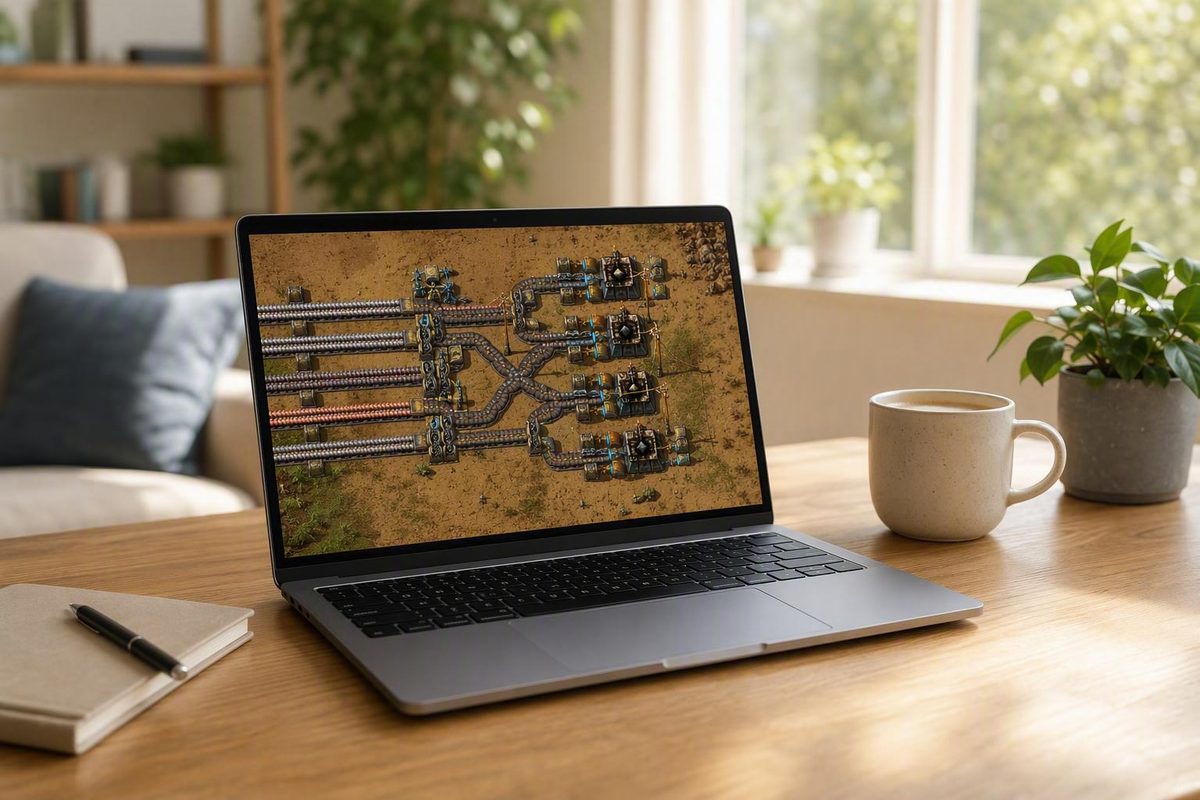
If you searched for 2 to 3 lane balancer Factorio, the keyword is doing two jobs at once.
In strict Factorio terms, a lane balancer usually means a device that equalizes the left and right lanes of a single belt. In everyday player language, though, people also use “lane balancer” loosely for small belt balancers that take a couple of inputs and spread them across several outputs.
That distinction matters because it explains why search results can feel inconsistent. Some pages are showing true lane-mixing designs. Others are showing multi-belt balancers. And many repository entries are excellent for footprint, item counts, version tags, and copyable blueprint strings, but much weaker on formal proof of behavior under blocked outputs, partial inputs, or awkward lane draw. So the smartest way to use them is not as unquestioned truth, but as well-known starting points you can test inside your own save.
For most players, the real problem is practical rather than theoretical:
- two supply lines need to feed three consumer belts,
- one branch keeps starving before the others,
- a compact balancer is easier to stamp than redesigning the entire area,
- or an uneven consumer layout is exposing lane bias that total throughput numbers hide.
The good news is that the community has published several clear 2-to-3 options, including a compact express-belt print, a long 5x7 design, a wide 7x5 design, and a larger curated balancer book that includes a 2-3 TU entry. The less-good news is that repository pages usually tell you what to place, not everything you might want to know about edge-case performance. That is why this guide focuses on both blueprint metadata and the balancing concepts that tell you how to judge a design after import.
What Is a 2-to-3 Lane Balancer in Factorio?
In the way players usually use the phrase, a 2-to-3 lane balancer is a compact build that takes material from two incoming belts and redistributes it across three outgoing paths as evenly as the layout allows. Internally, these builds typically use splitters and underground belts to remix item flow so that one output is less likely to get favored just because of routing order.
It helps to keep the terminology clean. A belt balancer works across multiple belts. A lane balancer works across the two lanes of a single belt. The search phrase “2 to 3 lane balancer” is therefore a little imprecise, because most examples people mean are really 2-to-3 belt balancers, not pure single-belt lane equalizers. Still, the search phrase is common enough that it makes sense to answer it directly, as long as the distinction stays visible.
That distinction becomes important when you are diagnosing the actual problem in your factory.
Why do players use these at all? A build can look “supplied” in a broad sense while still failing in a local sense. One branch stays compressed. Another sputters. A third looks fine until demand spikes.
Typical places where players reach for a 2-to-3 balancer include:
- splitting two production belts into three consumer columns,
- feeding three parallel build lanes from two shared lines,
- bridging awkward bus geometry,
- or cleaning up a retrofit where new demand was added downstream without rebuilding the original input side.
The core idea is simple: you are not trying to manufacture extra throughput. You are trying to make better use of the throughput you already have, so the downstream part of the factory sees a more even supply pattern.
That is also why small 2-to-3 designs attract so much interest. They sit in the sweet spot between “too trivial to discuss” and “large enough to require a full balancer book.”
Belt Balancer Mechanics Explained
The basic mechanic behind all of this is the splitter. Factorio’s balancer logic relies on the fact that splitters send items to their two outputs in a 1:1 ratio and also take items evenly from both inputs. The official wiki further separates balancers into input-balanced designs, which draw evenly from inputs, and output-balanced designs, which distribute evenly to outputs. It also defines throughput unlimited balancers as designs that can maintain full throughput under full load with arbitrary input-to-output routing and no internal bottleneck.Factorio Wiki
That sounds abstract until you apply it to a real 2-to-3 situation. Suppose two belts are entering a block and three belts are leaving it. If the layout only looks balanced in the ideal state where both inputs are full and every output is free, that may be enough for a screenshot, but not enough for a live base. The moment one output stalls, or one input belt runs light, or only one lane on a consumer line is being eaten, internal routing choices start to matter.
This is why experienced players tend to ask three different questions instead of one vague question:
- Does the build draw evenly from the inputs?
- Does it distribute evenly to the outputs?
- Does it keep acceptable throughput when the factory is in a non-ideal state?
Those are related questions, but they are not the same question. A balancer can look fair at the output side while pulling disproportionately from one input. Another can be tidy at full compression but become awkward when one branch backs up. A third can be fine for yellow or red belt geometry and then become a different shape or different problem once underground lengths and routing change.
The wiki’s formal language helps because it stops “balanced” from becoming meaningless. In everyday conversation, players often say a design is balanced when they really mean one of the following:
- it looks symmetrical,
- it spreads items around “well enough,”
- it prevents a single output from starving first,
- or it seems fine in a quick sandbox test.
Those are useful observations, but they do not automatically prove input balance, output balance, or throughput-unlimited behavior.
A 2-to-3 problem is especially interesting because it is not a neat power-of-two case. Splitter-based networks are easiest to reason about when they divide into 2, 4, 8, and so on.
So when a repository listing gives you counts, version, and preview image, that is valuable metadata—but it is still metadata. It tells you the build exists, how much it costs, and often how compact it is. It does not automatically certify every partial-load behavior you may care about.
The practical lesson is straightforward: use the blueprint page to decide whether a design is worth trying, and use a controlled in-game test to decide whether it belongs in your production blueprint book.
Compact Express Belt 2-to-3 Balancer Blueprint
If you want a blue-belt-ready starting point, the clearest express-belt listing in this evidence set is the Compact 2 to 3 balancer entry on Factorio Prints. The page lists 19 express transport belts, 4 express splitters, and 4 express underground belts, tags the design as vanilla, labels it for express transport belt (blue) and compact, and shows that it was created 3 years ago for Factorio 1.1.87 with copy, blueprint, and JSON display options.Factorio Prints
The item list is explicit, the belt tier is explicit, and the page clearly presents the print as a small practical blueprint rather than a theory thread.
The important limitation is that the visible listing text supports the ingredient list and versioning, but not a confirmed footprint. If you need exact dimensions before committing to a layout, this page is weaker than the FactorioBin entries discussed below. In other words, it is a good source for what you must build, but not as good for how many tiles you must reserve unless you inspect the blueprint directly in-game or through the page’s copy/display tools.
That caveat is not a knock against the print. It just defines what the evidence can and cannot say. Based on the listing, you can responsibly describe this design as a compact, vanilla, express-belt 2-to-3 blueprint with a clear item list. You cannot responsibly describe it as formally proven or give an exact footprint unless you verify that elsewhere.
In practice, this print is most appealing when your base has already standardized on blue belts and you want a clean repository entry with minimal ambiguity about materials. It is less appealing if your first constraint is tile planning rather than belt tier.
Long 2-to-3 Balancer Blueprint (5x7)
The most concrete small-footprint option in the evidence set is the FactorioBin 2 to 3 (Long) blueprint. Its listing gives a 5 x 7 size, 19 transport belts, 4 underground belts, and 2 splitters, a 1.1.53 version label, an anonymous posting date of 5 years ago, and a visible page count of 327,014, along with preview and blueprint string view/copy options.FactorioBin Long
From a builder’s perspective, the standout detail is the low splitter count. If you are stamping a lot of these in an earlier-stage factory, or simply prefer cheap and understandable routing, that matters. The 5x7 footprint also makes it easy to fit in spaces where vertical length is available but sideways expansion is awkward.
It gives you a compact, low-splitter answer to a common asymmetrical routing problem.
The page’s limitation is the same broader limitation seen across blueprint repositories: it is rich in metadata, not in test methodology. You get size, contents, version, preview, and copyability. You do not get a formal statement of input balance, output balance, blocked-output behavior, or one-input performance. So the responsible interpretation is that this is a popular, clearly documented layout, not a mathematically certified one.
Even with that caution, the long version remains a very useful reference design. If you want one legacy-style 2-to-3 blueprint to try first because it is cheap, compact, and heavily surfaced in the community, this is a strong candidate.
Wide 2-to-3 Balancer Blueprint (7x5)
The companion layout is FactorioBin’s 2 to 3 (Wide) variant. Its listing gives a 7 x 5 footprint, 16 underground belts, 4 splitters, and 2 transport belts, marks it for Factorio 1.1.53, notes a 529-byte blueprint string, shows Snapping: None, and displays a visible page count of 320,897.FactorioBin Wide
The item profile tells you a lot before you ever paste it. Compared with the long version, this print spends far more on underground routing and splitters while using very few plain transport belts. It is paying extra to fold the network into a wider, shallower space.
That makes the wide version attractive in a different class of builds. For example, a wide balancer can make more sense between parallel machine rows, inside a belt-heavy mall, or in a bus area where depth is more disruptive than width.
The obvious downside is cost and complexity. A design with 16 underground belts is not the same commitment as one with 4 underground belts. In late game that may barely matter. In earlier phases, or in large repeated placements, it can matter a lot. So the choice between long and wide is not just aesthetic. It is a trade between footprint orientation and material appetite.
As with the long version, nothing on the page should be read as formal proof of perfect balancing behavior. What the listing gives you is a well-defined shape, a well-defined ingredient profile, and a copyable blueprint string. That is enough to make it useful. It is not enough to skip testing if your build is sensitive to edge cases.
Raynquist’s Blueprint Book: 2-3 TU Balancer
If you would rather work from a curated library than from isolated single prints, Raynquist’s Belt Balancers Fall 2025 collection is the most systematic source in this set. The listing says the book covers balancers from 1-1 to 9-9 plus larger extras, includes lane balancers for 1, 2, 3, 4, 6, and 8 lanes, and specifically lists a 2-3 TU balancer at position 1.2 under the 2 to x section. It is credited to Scott Ellis (Elys Storm), shows 594 favorites, is marked Version 2.0.69.0, and states that the source blueprints came from the GitHub raynquist/balancer repository.Raynquist’s book
That entry is important because it changes the use case. The single-print pages above are good when you need one balancer right now. A curated book is better when you routinely solve balancer problems and want consistent naming, organization, and tier notes in one place. That convenience alone has real value if you build blueprint books as infrastructure rather than one-off fixes.
The TU label is also meaningful, but it needs careful wording. The collection page confirms that a blueprint with the name 2-3 TU balancer exists in the book. What the page itself does not do is present a full proof on the listing page. So the safest, evidence-faithful wording is not “this blueprint is proven TU here,” but “this collection includes a blueprint labeled 2-3 TU balancer.”
The belt-tier notes are similarly useful but deserve nuance. The listing says the book is configured for blue belts, that most smaller balancers can be downgraded to yellow or red belt without issue, and that designs requiring longer underground lengths have yellow-belt alternates in a separate folder. That is encouraging for practical use, especially if you upgrade and downgrade belt tiers often, but it is still a collection-level statement rather than a bespoke proof about every individual entry.
Versioning is the other major consideration. Because this is a 2.0 export, players staying on older 1.1.x saves should not assume frictionless import behavior. For them, the individual 1.1-era repository prints may be the safer immediate option.
So the book’s real strength is not just one 2-to-3 design. Its strength is that it gives you a wider balancing toolkit and a consistent environment for comparison. If you think in terms of blueprint systems rather than isolated fixes, that may matter more than the individual footprint of any one small balancer.
Input vs Output Balanced: Key Differences
The cleanest way to frame the difference is this: input-balanced means the balancer draws evenly from the available inputs, while output-balanced means it fills the available outputs evenly. A design can be strong in one sense and weaker in the other.
That distinction shows up clearly in community discussion around lane balancing. In the Steam thread on one-belt lane balancers, posters share splitter-and-underground solutions for separating lanes, remixing them, and merging them again, and one participant explicitly notes that a shown design is an output balancer only rather than necessarily both input- and output-balanced.Steam discussion
A layout can make the three outgoing lines look reasonably fair while still pulling harder from one of the two inputs. Or it can draw nicely from both inputs while letting one downstream line fill first under certain demand patterns. If one upstream source is fragile, input behavior matters more. If three consumers are starving unevenly, output behavior matters more.
Community comparison threads also show why screenshots alone are not enough. In the Factorio Forums comparison of lane balancers, players post blueprint strings, images, and GIFs showing how designs behave when only one lane is consumed, when compression is imperfect, and when express-belt behavior differs from slower tiers. One poster specifically notes a two-belt version failing to balance properly on express belts when inputs and outputs are not fully compressed.Factorio Forums comparison
That does not prove that any specific 2-to-3 blueprint in this article fails in the same way.
A practical test set for a 2-to-3 design usually looks something like this:
- run both inputs fully and leave all outputs open,
- run only one input and watch how the three outputs fill,
- block one output and see whether the others stay acceptably supplied,
- create uneven downstream demand and look for favoritism,
- and, if belt tier changes the layout, test at the tier you actually plan to use.
The reason to separate those tests is that they answer different questions. Full-load open-output tests check basic throughput behavior. Single-input tests expose asymmetry. Blocked-output tests reveal bottlenecks. Uneven-demand tests show whether your real factory will be happy even if the balancer is not “perfect” in a theoretical sense.
So when you ask whether a 2-to-3 design is “good,” the better answer is usually another question: good for which failure mode? Once you know that, blueprint choice becomes much easier.
Community Comparisons and Tips
That is normal. Factorio building culture is full of designs that are widely useful, widely shared, and only partially documented.
That makes repository metadata more valuable than it might first seem. Even without a proof, you can learn a lot from a listing:
- the footprint tells you where it fits,
- the ingredient count tells you how expensive it is to repeat,
- the belt tier tells you how naturally it fits your current base,
- and the preview tells you whether the routing philosophy is simple or aggressively woven.
For the specific options covered here, the tradeoffs are pretty clear.
The long 5x7 version is the budget-minded, low-splitter option. If you want something compact, readable, and economical on splitters, it is the most attractive of the small legacy prints.
The wide 7x5 version is the shape-first option. If your space is broad rather than deep, and underground-belt cost is acceptable, it can be the easier fit despite its heavier routing bill.
The compact express print is the blue-belt convenience option. Its strength is not a published footprint but an explicit express-belt ingredient list and a clean vanilla repository entry.
The Raynquist book is the library option. It makes the most sense when you want not just one 2-to-3 balancer, but an organized balancer toolbox with naming structure and adjacent alternatives.
A second community lesson is that balancing closer to consumption often beats endlessly rebalancing farther upstream. If a downstream area is built in a way that only draws one lane or favors one belt, a global balancer can mask the symptom without eliminating the local cause. Sometimes the smarter fix is a smaller local balancer, a better lane merger, or a consumer layout that stops creating the imbalance in the first place.
That mindset helps prevent a common mistake: treating every uneven belt as proof that you need a bigger balancer. Often you need a better consumer interface, not a more elaborate upstream patch.
A third lesson is that partial-load behavior matters more than perfect screenshots. A balancer that looks excellent in an all-belts-full sandbox may still disappoint in a live base where trains arrive unevenly, demand pulses, or one branch frequently idles. This is why short test rigs are so useful. They let you answer the practical question—“Will this behave well enough here?”—without pretending every small balancer needs a doctoral defense.
A sensible workflow is:
- pick a blueprint whose footprint and material cost fit your build,
- paste it into a sandbox or test area,
- test open-output and blocked-output states,
- test one-input and two-input states,
- then keep the version that behaves best for your actual downstream pattern.
That approach respects both sides of the evidence. It takes community blueprints seriously as useful tools, and it also respects the fact that listing pages rarely prove everything a perfectionist might want proved.
For most factories, that is the right balance between theory and speed. Import a known design. Test it under your own conditions. Then promote it from “community print” to “house standard” only after it earns the job.
What items are required for the compact 2-to-3 express balancer?
The Factorio Prints listing gives the compact express version as 19 express transport belts, 4 express splitters, and 4 express underground belts for Factorio 1.1.87, with vanilla and blue-belt tags.Factorio Prints
How many belts and splitters in the long 5x7 2-to-3 blueprint?
The long FactorioBin design is listed at 5 x 7 and uses 19 transport belts, 4 underground belts, and 2 splitters on a 1.1.53 page entry.FactorioBin Long
Differences between long, wide, and compact 2-to-3 variants?
The main differences are shape, belt tier, and where the cost sits.
The long version prioritizes a narrow footprint and low splitter count.
The wide version prioritizes a shallower, broader footprint and spends much more heavily on underground routing.
The compact express version is the clear blue-belt option with an explicit express-tier ingredient list, but its visible repository listing is stronger on item counts than on published footprint detail.
So the best choice is usually not “which one is universally best,” but “which one matches my space, tier, and tolerance for underground-belt cost?”
Does Raynquist’s book support yellow or red belts for 2-3?
The collection page says the book is configured for blue belts, that most smaller balancers can be downgraded to yellow or red belt without issue, and that yellow alternates are provided for designs that need longer underground lengths; it also identifies the 2-3 TU balancer in the 2 to x section of the book.Raynquist’s book
Are these balancers input and output balanced?
Not automatically. Formally, input-balanced means drawing evenly from inputs, output-balanced means distributing evenly to outputs, and throughput unlimited is a stricter standard beyond both; repository pages that list sizes and item counts do not by themselves prove those behaviors for every live-factory condition.Factorio Wiki